Setup
Restoring Printer to Factory Settings (Required for Mod Installation)
- Uninstall KlipperMod if previously installed.
- Reset the printer to default settings.
- Format a USB drive to FAT/FAT16/FAT32.
-
Copy the appropriate file from the Native firmware to the USB root directory:
- Adventurer5M-3.1.9-2.2.3-20250807-Factory.tgz for FF5M
- Adventurer5MPro-3.1.3-2.2.3-20250107-Factory.tgz for FF5mPro версии
- AD5X-1.1.7-1.1.0-3.0.6-20250912.tgz for AD5X
-
Power off the printer.
- Insert the usb drive into printer usb port.
- Power on the printer.
- Wait for the stock firmware installation to complete.
- Configure Wi-Fi or Lan new beaver
- Get the latest printer updates or install firmware 1.1.7 for AD5X, or 3.2.3 for AD5M/AD5MPro if you don't want the printer to measure the bed center before each print
Installing the Mod
- Restore the printer to factory settings. AD5X Warning
- Format a USB drive to FAT/FAT16/FAT32.
-
Copy the mod file to the USB root directory:
- For FF5M: Adventurer5M-zmod-*.tgz
- For FF5M Pro: Adventurer5MPro-zmod-*.tgz
- For AD5X: AD5X-zmod-*.tgz
-
Power off the printer.
- Insert the USB drive.
- Power on the printer.
- Wait for the mod installation to complete.
Installation on the AD5X can take up to 40 minutes
- Remove the USB drive.
- Power the printer.
-
Open the printer's IP address in the browser
If the web interface doesn't open, the stock firmware has disabled the mod. To enable it, copy the file AD5X-ENABLE-zmod.tgz to a USB flash drive and activate the mod. 12. Translate the mod into your language.
Or type in the console:
LANG LANG=en -
Configure the mod
This shows parameters used at print start, print end, and global settings. It is recommended to just review the settings — do not change them unless necessary. The description for each parameter can be found here.
You must proceed to the last screen and press
OkorReboot. If you skip this, the window will appear on every boot.To display this window again later, type in the console:
GLOBAL -
Go to
Settings→Firmware Updates - Click
Check for Updates, and wait until the check completes -
Click Update and update all components.
If many errors appear — this is normal. Plugins are not part of the firmware and are downloaded separately. Click
Check for Updatesagain, then restore and update each module individually. The printer will reboot during the process. -
Enable the recommendations plugin
Or enter in the console:
ENABLE_PLUGIN name=recommend -
Send Files via "Octo/Klipper" for Printing
You need to switch to the Octo/Klipper protocol:
- Protocol:
Octo/Klipper- Hostname:
Printer_IP:7125 - Host URL:
Printer_IPorPrinter_IP:80
- Hostname:
- Protocol:
-
The entire start code should be replaced with this:
START_PRINT EXTRUDER_TEMP=[nozzle_temperature_initial_layer] BED_TEMP=[bed_temperature_initial_layer_single]
M190 S[bed_temperature_initial_layer_single]
M104 S[nozzle_temperature_initial_layer]
SET_PRINT_STATS_INFO TOTAL_LAYER=[total_layer_count]
START_PRINT EXTRUDER_TEMP=... BED_TEMP=...should be written on one lineThe end code should be this:
END_PRINTCode for before changing the layer to this one:
SET_PRINT_STATS_INFO CURRENT_LAYER={layer_num + 1} -
- Read the FAQ
AD5X Warning
After installing the Native Firmware, the print head may not be correctly positioned against the filament receiver (the receiver shutter may not be fully closed, filament may be pushed onto the table, etc.).
Via the engineering menu on the stock firmware
If you encounter this issue, you need to calibrate the print head position using the following algorithm:
- Download the Set.XY.Offset.zip archive and unzip it to the root of a flash drive.
- Insert the flash drive into the turned-off printer and turn it on.
- The calibration interface will appear on the printer screen. Press Reset.
- Use the control arrows to position the print head against the receiver so that the print head presses the shutter lever firmly, the nozzle is behind the movable shutter, and the shutter itself is flush with the front surface of the receiver.
- Press the Set button to confirm the calibration result.
- Remove the flash drive and reboot the printer.
Updating the Mod
If the mod displays ("Update Z-Mod via USB"), you must update via USB, even if recently updated.
Updating via USB preserves all data.
Simplest method: Use the ZFLASH macro. Insert the USB drive, reboot the printer, and run ZFLASH. The macro will:
- Check for the latest version.
- Download the latest release for your printer model.
- Verify checksums.
- Reboot the printer.
- Automatically install the update (keep the USB drive inserted for future updates).
After installation:
- Go to Fluidd/Mainsail →
Settings→Software Update. - Click
Check Updatesand install the latest Z-Mod updates.
If it shows a lot of errors, that's normal.
Plugins aren't included in the firmware and are downloaded separately.
Click Check for updates. Then restore and update all modules one by one. The printer will reboot during this process.
Version Compatibility:
- The OS version (under
System→Distribution) must match the first two digits of the Z-Mod version (Settings→Updates→ffm5/zmod). - Mismatched versions cause instability.
Manual USB Update:
- Format a USB drive to FAT/FAT16/FAT32.
- Copy the mod file to the USB root.
- Power off the printer.
- Insert the USB drive.
- Power on the printer.
- Wait for the reboot and installation.
- Remove the USB drive.
- Power cycle the printer.
Removing or Temporarily Disabling the Mod
- SKIP_ZMOD: Reboots without starting Moonraker/Fluidd.
- REMOVE_ZMOD: Fully uninstalls the mod.
Recommended method: Use the REMOVE_ZMOD macro. Use USB removal only if macros are unavailable.
Attention!
- If you are using Klipper 13, you must run
UPDATE_MCU. This will prevent the MCU and Klipper from being different versions. - If you have enabled plugins, you must first disable them using
DISABLE_PLUGIN name=g28_tenz
USB Removal:
- Format a USB drive to FAT/FAT16/FAT32.
- Copy flashforge_init.sh to the USB root.
- Power off the printer.
- Insert the USB drive.
- Power on the printer.
- Wait for three reboots.
- Remove the USB drive.
Updating Stock Firmware
-
Disable all active plugins except
recommend,timelapse, andnotify:DISABLE_PLUGIN name=plugin_name -
If you are using Klipper 13, run
UPDATE_MCUbefore updating the stock firmware. This prevents version mismatch issues between the MCU and Klipper. - Enable Chinese cloud services (if you wish to update via the stock touchscreen):
SAVE_ZMOD_DATA CHINA_CLOUD=1
For AD5X, Z-Mod activation is required via AD5X-ENABLE-zmod.tgz from a USB drive—after updating the stock firmware.
Support Mod Development
BTC 17wXTd9BqYp1K3zCLTxVyGLEXUDjf7XNLL
Boot Recovery
Guide by @darksimpson, Alexander, @Ikaros413, @SoloMen88
Symptoms: Printer freezes on boot screen and is unreachable via LAN.
Try restoring the firmware by installing a full firmware:
Steps:
- Unplug the printer.
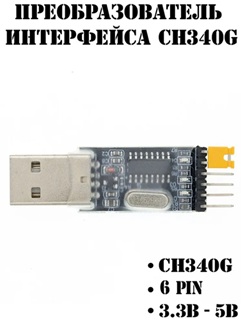
- Prepare a 3.3V UART/USB converter (ensure jumper is set to 3.3V).
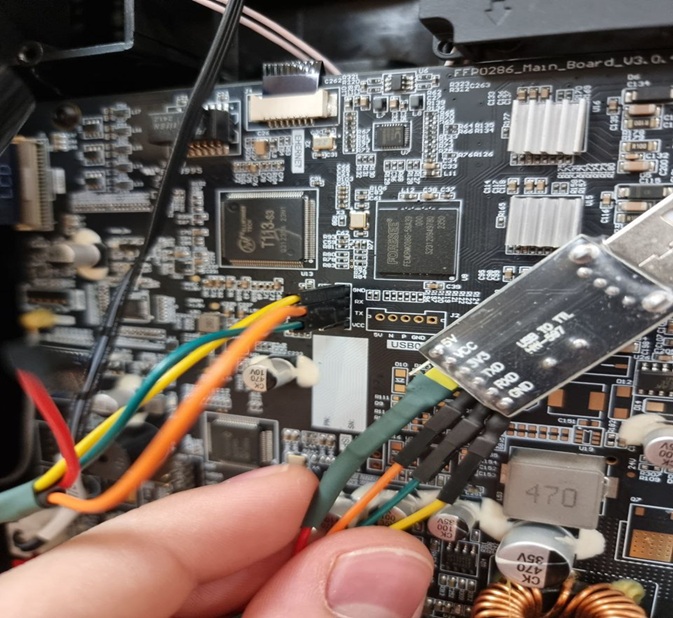
- Open the printer’s rear panel.
- Connect to the UART pins (RX, TX, GND — do NOT connect 3.3V).
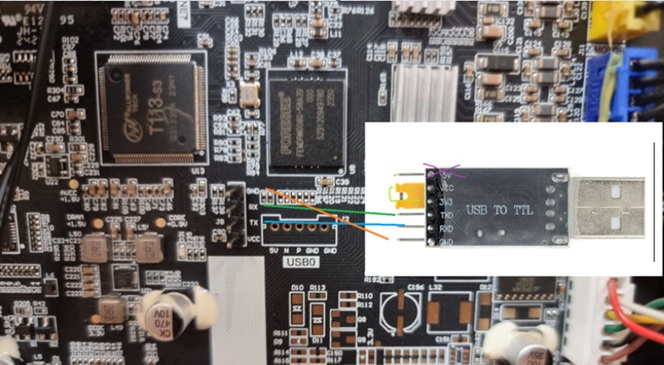
WARNING: 5V input will damage the motherboard!
-
Connect the converter crosswise:
- Converter RX → Printer TX
- Converter TX → Printer RX
- Converter GND → Printer GND
- Identify the new COM port in your OS.
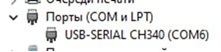
-
Open PuTTY:
- Connection type: Serial
- Speed: 115200
- COM port: (e.g., COM6)
-
Power on the printer.
-
When
Hit any key to stop autobootappears, press Enter. -
In U-Boot, run:
setenv init /bin/sh boot -
After Linux boots, remount the filesystem as writable:
mount -t proc proc /proc mount -o remount,rw / -
Fix corrupted files (e.g., delete faulty scripts):
rm -f /etc/init.d/S01bad_script rm -f /opt/config/mod/.shell/S98camera -
Save changes and reboot:
sync
reboot