AD5X
AD5X
- Key Features
- File Preparation in Orca
- Color Selection (
COLOR) - Print Menu (
PRINT) - Manual Spool Selection
- Add custom colors
- IFS Firmware Recovery
Plugins
- bambufy - Bambu Studio compatibility, better prime towers, accurate estimates, waste reduction
- lessWaste - Fork of Bambufy
- nopoop - Maximum waste reduction by ninjamida
- IFS Jacker - Plugin to support the IFS Jacker hardware mod
1. Key Features
Differences from AD5M:
- No
Entwaresupport - Always use
FAST_CLOSE_DIALOGS(fast closing) instead ofCLOSE_DIALOGS(slow closing). - The
NEW_SAVE_CONFIGmacro does not work. - To enable the camera, use
CAMERA_ON VIDEO=video3orCAMERA_ON VIDEO=video0orCAMERA_ON VIDEO=video99. - Klipper may crash. Solution:
Process Profile->Other->Output G-code-> uncheckExclude Models.
2. How to Prepare a File in Orca
Send Files via "Octo/Klipper" for Printing
You must remove unused spools from the list in Orca.
Example: The printer has 4 spools (№1, №2, №3, №4). Only spools №1 and №3 are needed for printing.
- In the file, they will be named T0 (first color) and T1 (second color).
- In the menu, you’ll need to select:
- T0 → spool №1
- T1 → spool №3
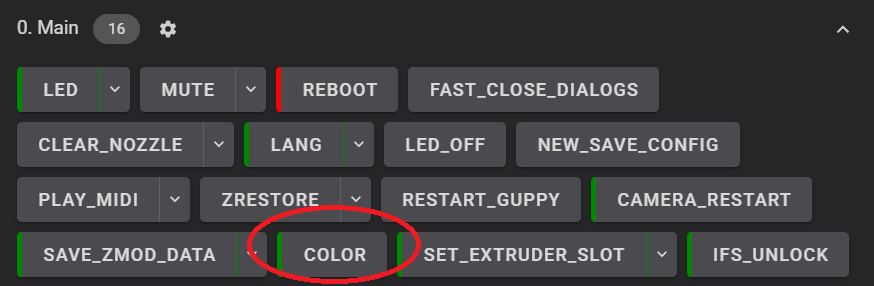
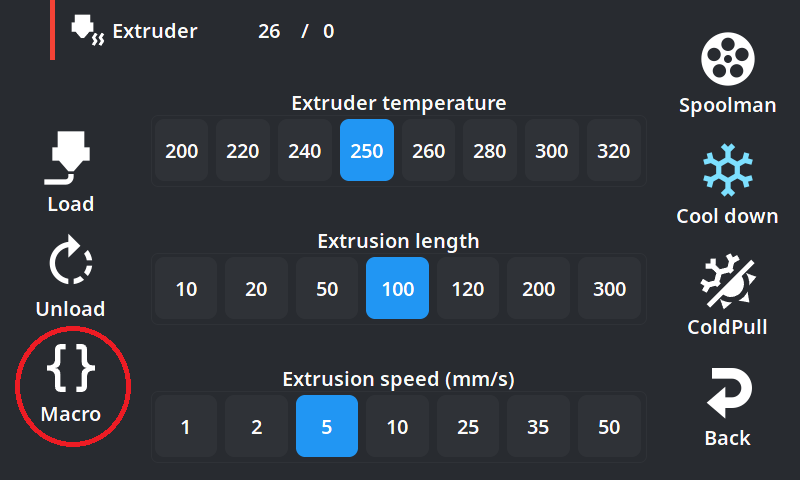
3. How to Use the Color Selection Menu (Macro COLOR)
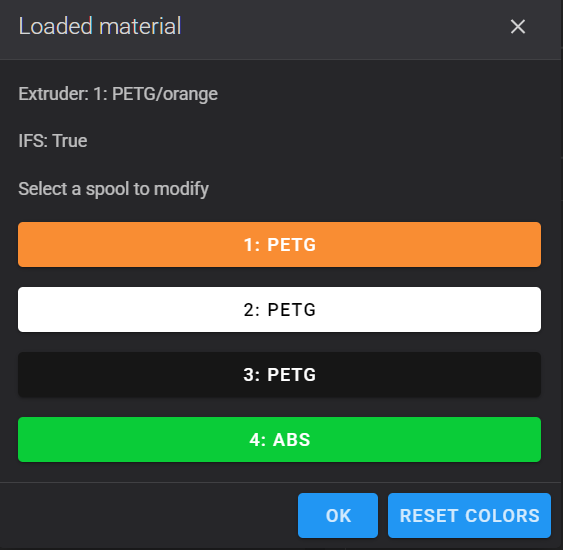
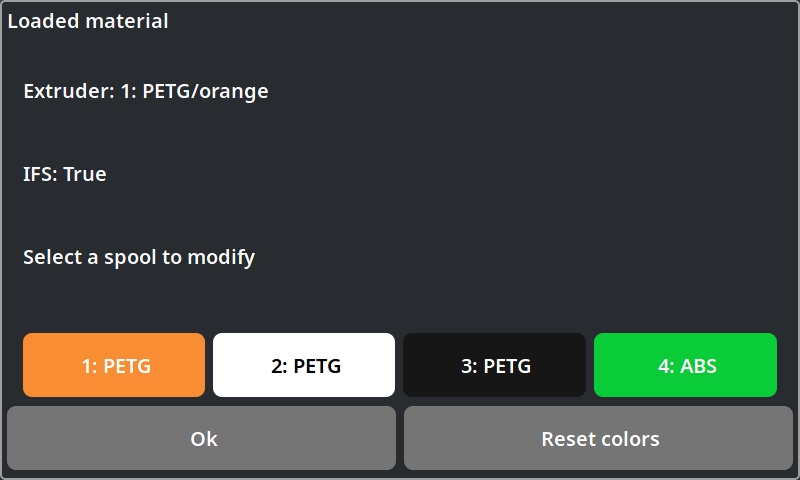
Extruder: 1 (PETG/Orange)– This means the printer is currently loaded with orange PETG filament from spool №1.IFS: True– The automatic filament feeding system is active.
Now select the spool you want to work with (e.g., spool 2):
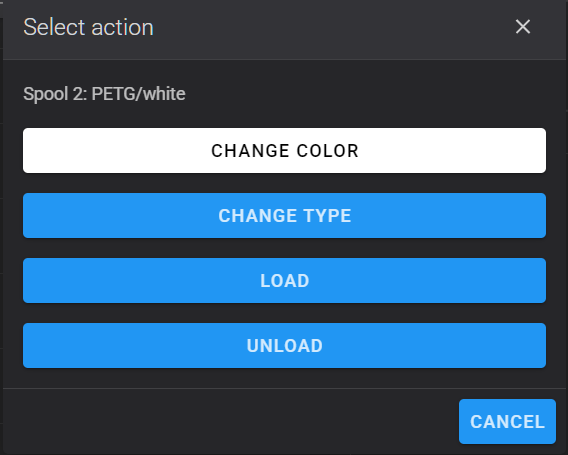
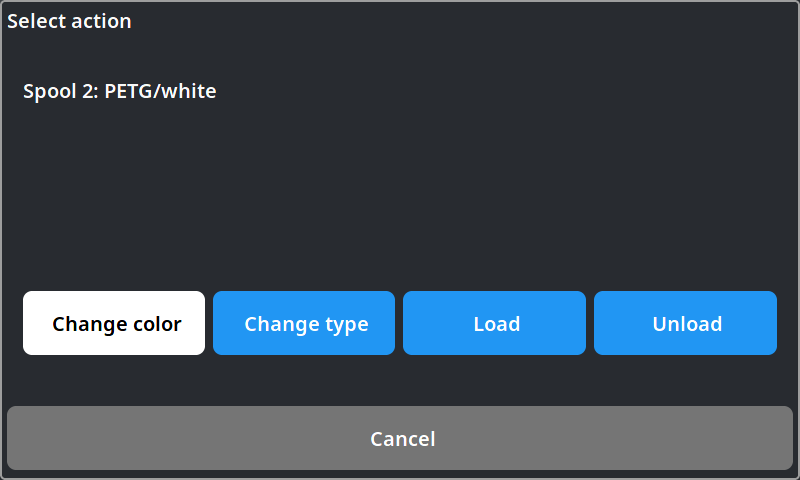
You can perform four actions:
- Change the color of the spool.
- Change the material type (e.g., from PLA to PETG).
- Load this filament into the printer.
- Unload filament from the printer.
How to change color:
- Click "Change Color".
- Select a color from the list. This ensures the printer and native screen understand your selection.
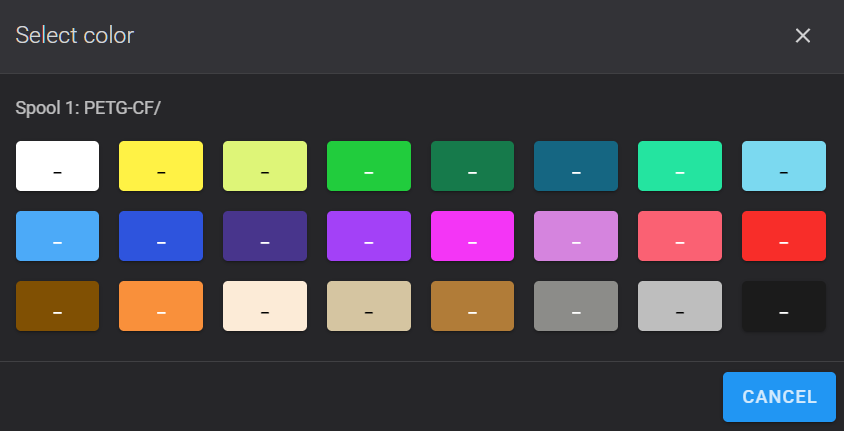
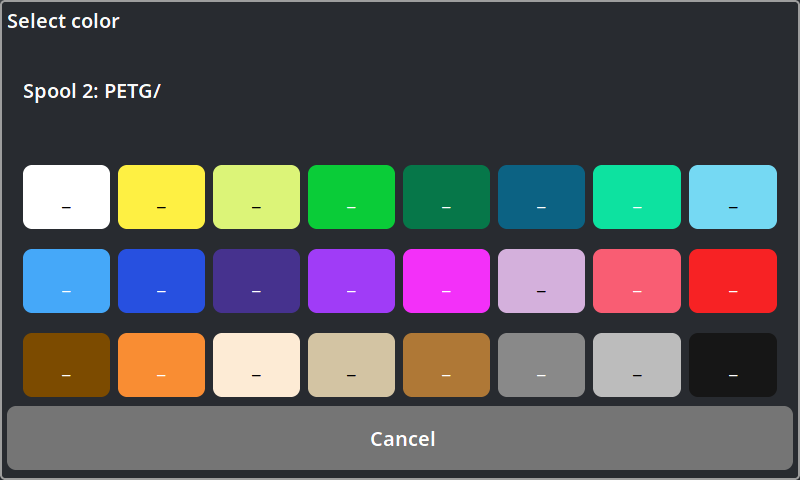
- After selection, you’ll return to the menu, and the spool’s color should update.
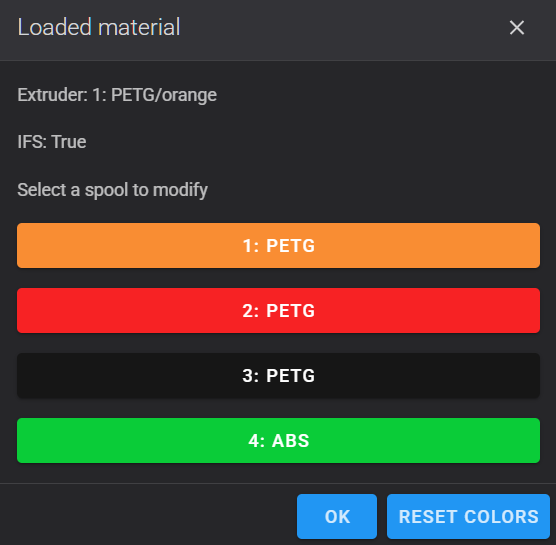
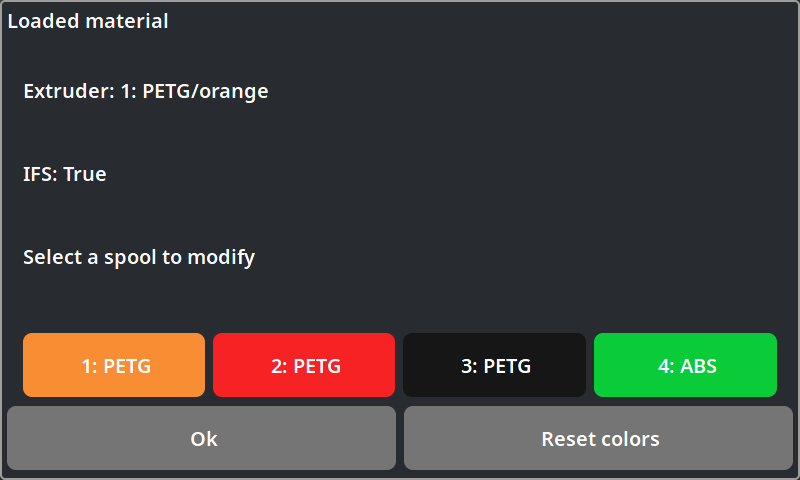
If the color doesn’t change: Close the window with the "X" button and restart the COLOR macro. Sometimes the screen doesn’t refresh immediately.
How to change material type:
- Click "Change Type".
- Select a material type from the list.
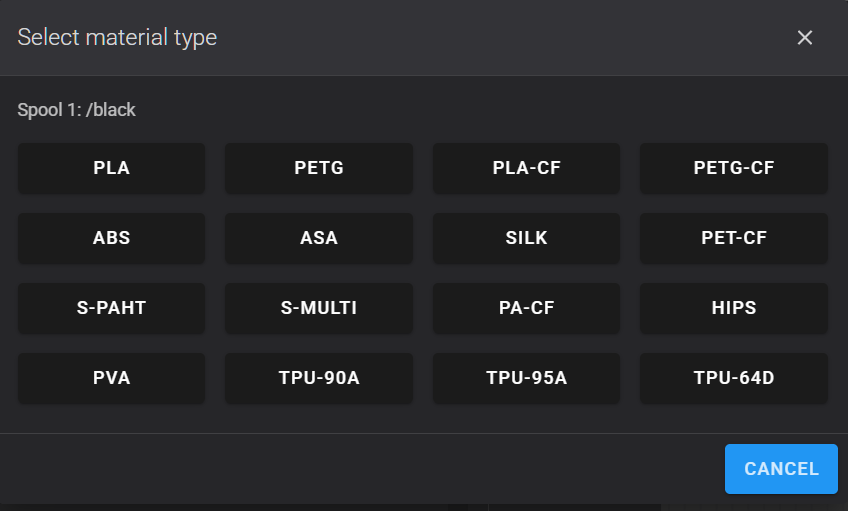
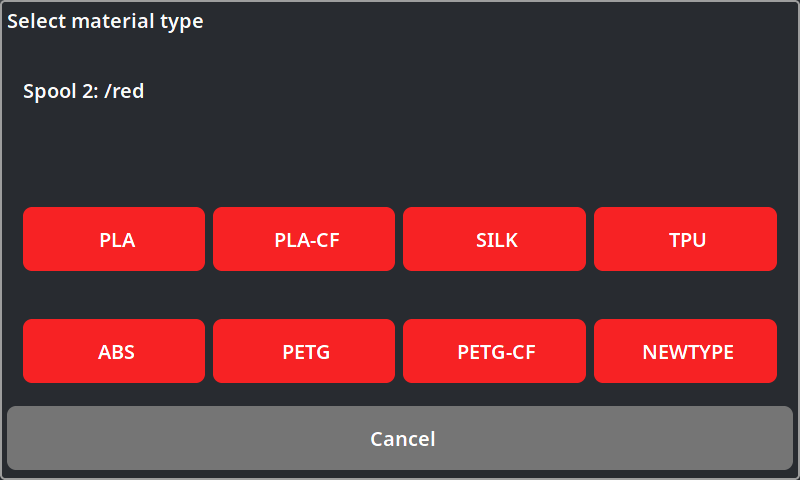
If the type doesn’t change: Close the window with the "X" button and restart the COLOR macro. Sometimes the screen doesn’t refresh immediately.
Tip: If multiple spools are assigned the same color and material type, the printer will automatically switch to the next spool when the current one runs out. This is called "infinite spool mode".
4. Print Menu (Macro PRINT)
This window opens by itself when you start printing.
Alternative: with the ORCA_FF parameter, spools for colors are chosen right in OrcaSlicer or Flash Studio when sending a print.
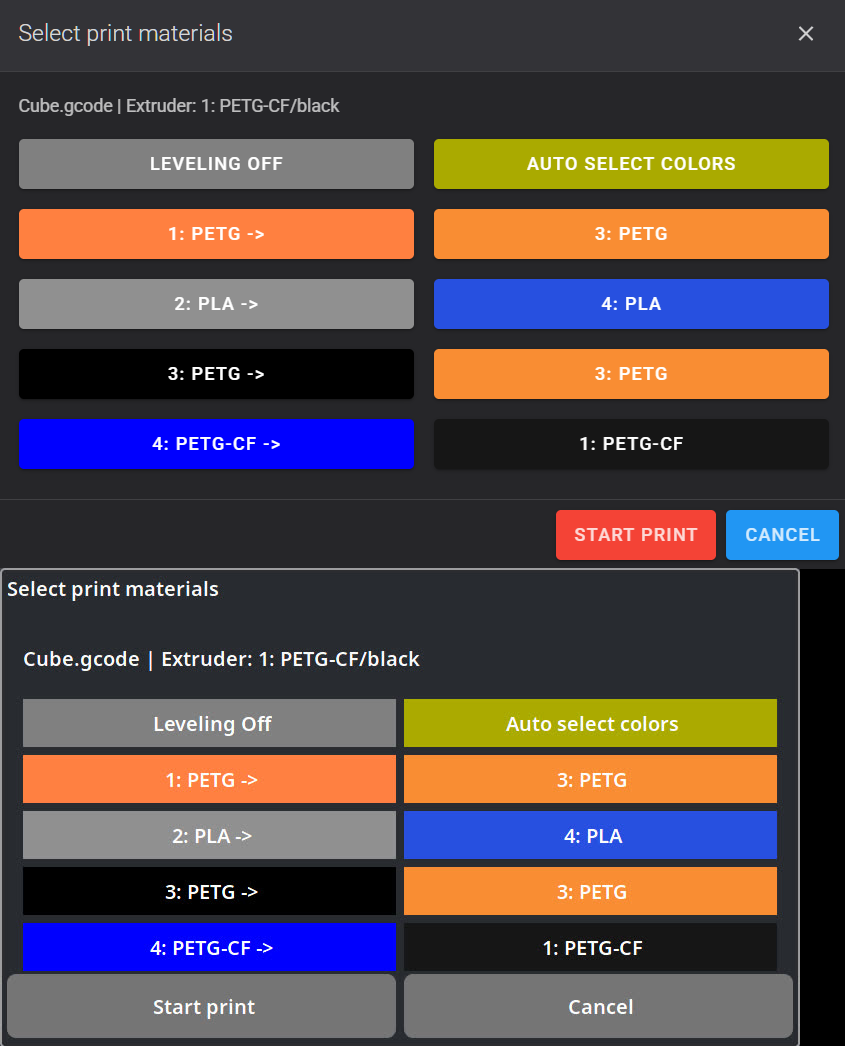
How to understand what is written here:
- In the left column are tool numbers and colors from the file passed from the slicer.
- In the right column are spool numbers and colors loaded/used on the printer.
Cube.gcode– this is the name of the file being printed.1: PETG ->– this is the first color from the file (orange PETG). It is printed with filament from spool 3 (orange PETG).2: PLA ->– this is the second color (gray PLA). It is printed with filament from spool 4 (blue PLA). Because there are no other PLA plastics in the printer.3: PETG ->– the third color (black PETG), printed from spool 3 (orange PETG). Because there are no other PETG plastics in the printer.4: PETG-CF ->– the fourth color (blue PETG-CF), printed from spool 1 (black PETG-CF). Because there are no other PETG-CF plastics in the printer.
If the image looks like this:
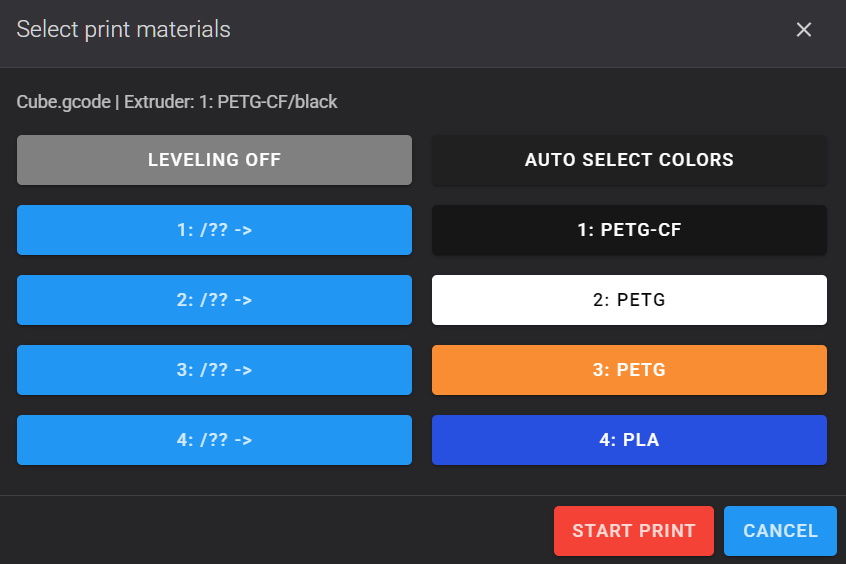
This means that you have disabled the auto color matching option and/or file scanning. You can click the AUTO_SELECT_COLORS button or enable it in global parameters:
SAVE_ZMOD_DATA SCAN_FILE_COLORS=1 AUTO_ASSIGN_COLORS=1
It is strongly recommended to enable the preprocessor
To change the spool for a color during printing:
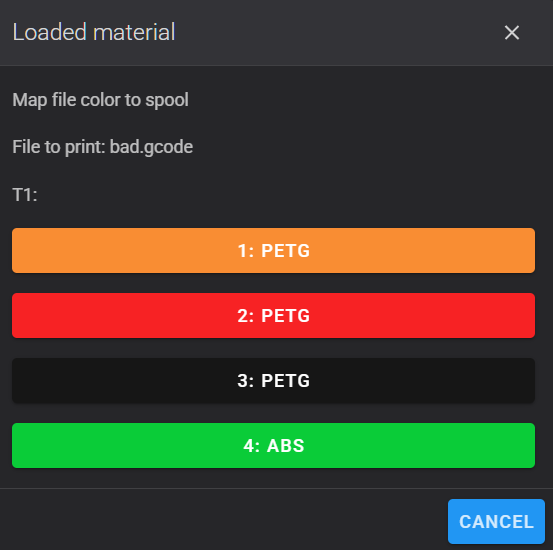
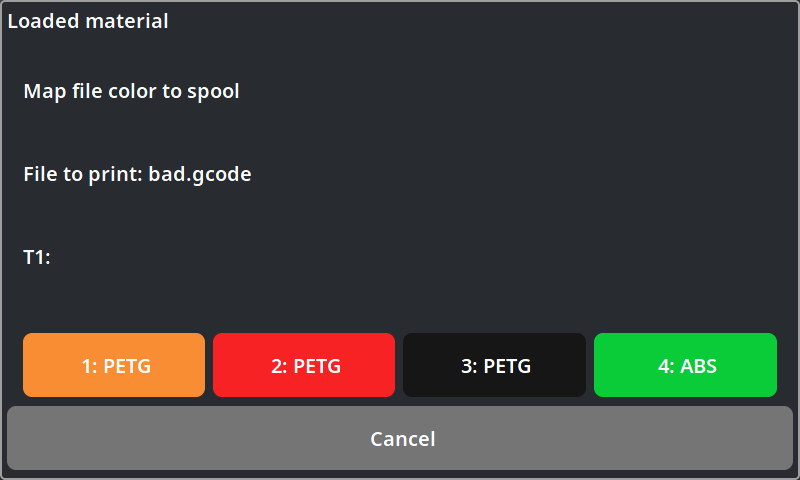
- Simply click the target T (e.g., T1) and select another spool from the list.
AD5X Global Parameters
To prevent the color selection dialog from appearing at the start of a print, use the global parameter SILENT:
- 0 – show dialog (default)
- 1 – do not show dialog, use previously set colors
- 2 – do not show dialog, do not use IFS
SAVE_ZMOD_DATA SILENT=1
To disable automatic filament insertion into the extruder, use the global parameter AUTOINSERT:
SAVE_ZMOD_DATA AUTOINSERT=0
To disable dumping of filament into the trash when printing, use the USE_TRASH_ON_PRINT parameter.
- 0 - No purge into the trash will occur. The print head will still travel to the trash chute during color changes on the first layer, to reduce blobs. If this is happening on every layer, check your start and layer change gcode!
- 1 - Purge will occur into the trash chute during color changes. Two purges of length equal to
filament_drop_lengthin filament.json (plusfilament_drop_length_addif the materials are different) will occur on each color change. - 2 - After inserting the new color, the print head will travel to the trash chute then return control to the slicer from there. This should only be used together with a slicer profile designed for this mode.
SAVE_ZMOD_DATA USE_TRASH_ON_PRINT=0
To unload the filament after printing is complete, use the REMOVE_FILAMENT parameter.
SAVE_ZMOD_DATA REMOVE_FILAMENT=1
To set how many tools are shown in the color selection window (if file cannot be scanned for this info), use the ALLOWED_TOOL_COUNT parameter.
SAVE_ZMOD_DATA ALLOWED_TOOL_COUNT=16
To enable scanning gcode files for tool, color and material info, use the SCAN_FILE_COLORS parameter. You can also set this to 2 to check for data prepared by the slicer script, but not attempt to scan entire files.
SAVE_ZMOD_DATA SCAN_FILE_COLORS=1
To attempt automatic mapping of colors in the gcode file to physical spools, use the AUTO_ASSIGN_COLORS parameter. You must enable file scanning for this to be useful. Using a value of 30 will abort silent mode prints if there is any issue with the auto-assignment.
You can create custom values for when to abort in silent mode by adding together the following values:
- 2 (At least one material cannot be matched; eg. the gcode file specifies ABS, but you only have PLA loaded; or material data could not be loaded)
- 4 (At least one color cannot be matched at all, usually due to file scanning being disabled or failing)
- 8 (At least one color is potentially a poor match)
- 16 (At least one physical spool has been assigned to more than one tool index in the file)
SAVE_ZMOD_DATA AUTO_ASSIGN_COLORS=30
When a color change command is encountered, if it indicates a switch to the already-loaded color, usually the change process would be skipped as it is pointless. If for some reason you wish to enable the full color change process, use the ALWAYS_FULL_COLOR_CHANGE parameter.
SAVE_ZMOD_DATA ALWAYS_FULL_COLOR_CHANGE=0
5. How to Manually Tell the Printer Which Spool Is Loaded
Sometimes you manually change the spool, but the printer doesn’t recognize it and displays outdated information.
To fix this, use a dedicated command.
Type this phrase in the console:
SET_EXTRUDER_SLOT SLOT=1
What this means:
SET_EXTRUDER_SLOT– Command telling the printer: "Remember this spool!"SLOT=1– The spool number you just loaded. You can change this number!
Examples:
- If you loaded filament from spool №3:
SET_EXTRUDER_SLOT SLOT=3 - If from spool №2:
SET_EXTRUDER_SLOT SLOT=2
After this command, the printer will know which spool is active and won’t mix up colors.
6. How to Configure Waste Filament During Filament Change
These settings help reduce plastic waste when switching spools. To adjust them, first disable the printer’s native screen using the DISPLAY_OFF macro.
In screen-off mode, these sensors are enabled:
Head Switch Sensor– Detects filament presence in the extruderIfs Motion Sensor– Monitors filament movement in IFS
How to find these settings:
- Open the "Configuration" tab.
- Navigate to the
mod_datafolder. - Open the
filament.jsonfile.
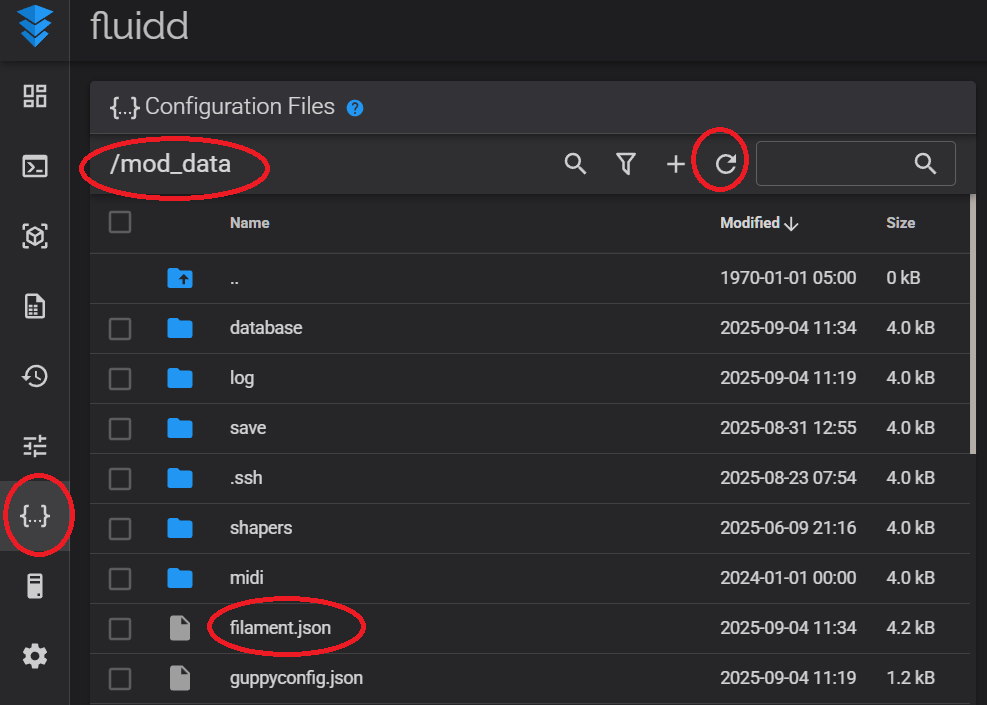
In this file, each material type (PLA, ABS, PETG, etc.) has a list of values. Here’s what they mean:
Basic Parameters (Most Frequently Adjusted):
For these settings to work, you need to disable the printer's native display using the DISPLAY_OFF macro.
temp— Nozzle temperature for filament change. Default value depends on material type.-
filament_drop_length(Purge Length)- In simple terms: How many millimeters of filament the printer will purge into the waste bin to clean the nozzle from the previous color. This applies when loading colors outside of printing or before a print, or when changing colors with USE_TRASH_ON_PRINT set to 1.
- Tip: Increase this value if colors mix during spool changes. Decrease it to reduce waste.
-
filament_drop_length_add(Additional Purge)- In simple terms: Extra purge length when switching material types (e.g., PLA to PETG), not just colors. This applies when loading colors outside of printing or before a print, or when changing colors with USE_TRASH_ON_PRINT set to 1.
- Why it’s needed: Different materials don’t mix well, so deeper nozzle cleaning is required.
-
nozzle_cleaning_length— The length (in mm) of filament pulled out of the extruder when cleaning the nozzle when the spool is no longer in use. Default: 60 mm. -
filament_unload_into_tube— How much filament to unload from the 4-in-1 module when the extruder is no longer used. Default: 70 mm.- If you have a new version 4-in-1 module, increase
filament_unload_into_tubeor, as a last resort, increasenozzle_cleaning_length
- If you have a new version 4-in-1 module, increase
Advanced Parameters (Do Not Adjust If Unsure of the Result):
For these settings to work, you need to disable the printer's native display using the DISPLAY_OFF macro.
filament_tube_length— Total PTFE tube length from IFS module to extruder. Useful for non-standard tubes. Default: 1000 mm.filament_unload_before_cutting— Filament lift distance before cutting. Default: 0 mm.filament_unload_after_cutting— Filament lift distance after cutting, before moving to the waste bin. Default: 5 mm.filament_unload_after_drop— Retraction distance after purging to prevent oozing. Default: 3 mm.filament_extruder_speed— Speed (in mm/min) at which filament is loaded into the extruder. Default: 300 mm/min (5 mm/s).filament_ifs_speed— Speed (in mm/min) at which the IFS module operates. Default: 1200 mm/min (20 mm/s).filament_fan_speed— Fan speed (0–255) during purging to cool oozing. Default: 102.filament_autoinsert_empty_length— Filament length pulled when auto-loading into an empty extruder. Default: 600 mm.filament_autoinsert_full_length— Filament length pulled when replacing existing filament. Default: 550 mm.filament_autoinsert_ret_length— Retraction distance after extruder sensor triggers (empty extruder only). Default: 90 mm.filament_autoinsert_speed— Auto-insertion speed (mm/min). Default: 1200 mm/min (20 mm/s).
Warning! Modifying advanced parameters may cause printer malfunctions, filament jams, or hardware damage. Adjust only if you fully understand each parameter’s purpose and potential consequences.
Key takeaway: To reduce waste, start by decreasing filament_drop_length and filament_drop_length_add for your material. Don’t forget to save the file after changes!
Slicer-controlled purge
It is possible to have the slicer control the purge instead by using other USE_TRASH_ON_PRINT settings, instead of the default value (1).
Nopoop Mode (SAVE_ZMOD_DATA USE_TRASH_ON_PRINT=0)
In this mode, no purge is performed by the printer during color changes. The printer will cut the filament, then return to the prime tower to unload and load filament, then immediately continue from there.
On the first layer, the printer will instead travel to the trash chute while changing filament, but will return to the prime tower afterwards without producing any poop.
In order to properly purge the old filament when in this mode, the recommended approach is to enable "Purge into prime tower" in OrcaSlicer's settings. This is found in the printer settings under the "Multimaterial" tab. You can then use the Flush Volumes setting to adjust purge amounts. If you wish to add a fixed amount to the automatically calculated flush volumes, you can do so by setting the "Nozzle Volume" under the General tab of printer settings.
It is normal for your prime tower to be considerably larger than usual when using this option, especially when working with thin layer heights.
You can additionally use options like "Purge to infill", "Purge to this object", etc when using this mode, to reduce the amount of waste purged into the prime tower.
This option is only supported in OrcaSlicer; it cannot be used with Bambu Studio due to the lack of "Purge in prime tower".
Slicer-Controlled Poop Mode (SAVE_ZMOD_DATA USE_TRASH_ON_PRINT=2)
In this mode, no purge is performed by the printer on its own during color changes. The printer will cut the filament, then travel to the trash chute, and return control to the slicer.
This mode requires proper support from the printer profile in the slicer, in particular, filament change gcode that handles pooping and returning to the prime tower afterwards is necessary. Do NOT use this mode with any gcode file that is not specifically sliced for it.
When using OrcaSlicer, options such as "Purge to infill" cannot be used in this mode. This is a bug in OrcaSlicer and cannot be fixed by Z-Mod. They work correctly when using Bambu Studio.
Printer profiles
Printer profiles set up for slicer-controlled purge are available for
These profiles are close to the stock AD5X profiles except for:
- All Z-Mod custom gcode added, including appropriate filament change gcode for
USE_TRASH_ON_PRINT=2 - "Purge in prime tower" enabled (OrcaSlicer only)
- Automatically sets correct
USE_TRASH_ON_PRINTsetting at the start of printing - Z-Hop type set to Normal
- Nozzle volume set to 144
- Filament unload time set to 66s for more-accurate estimates (based on default filament.json settings)
- Fan startup time set to 1.5s and kickstart to 0.5s (OrcaSlicer only)
When using OrcaSlicer, you can switch between the two modes by altering the "Purge in prime tower" setting. When it is enabled, nopoop mode will be used. When it is disabled, poop mode will be used. The profile will automatically set the correct USE_TRASH_ON_PRINT value for you at the start of a print.
When using Bambu Studio, only poop mode is supported.
If you do a print from these profiles in Slicer-Controlled Poop Mode, make sure to change your USE_TRASH_ON_PRINT setting back to 0 or 1 before printing any multicolor gcode that was not sliced with these profiles.
7. Add or remove filament types
For these settings to work, you need to disable the printer's native display using the DISPLAY_OFF macro.
To add a new filament type, add the following to mod_data/user.cfg:
[zmod_ifs]
filament_NEWTYPE: 300
To hide a filament type, add the following to mod_data/user.cfg:
[zmod_color]
hide_filament_types: XXX,YYY,ZZZ
IFS_PRINT_DEFAULTS - displays available filament types and their melting points
8. Add custom colors
For these settings to work, you need to disable the printer's native display using the DISPLAY_OFF macro.
To add or rename a color, open mod_data/color/en.json (use your language instead of en):
Add a new color or rename an existing one.
To display the color name, the color name must begin with an underscore _
Example:
{
"ffffff": "white",
"fffff1": "_transparent",
"fef043": "bright yellow",
"dcf478": "light green",
"0acc38": "green",
"067749": "dark green",
"0c6283": "blue-green",
"0de2a0": "turquoise",
"75d9f3": "cyan",
"45a8f9": "blue",
"2750e0": "dark blue",
"46328e": "violet",
"a03cf7": "bright violet",
"f330f9": "purple",
"d4b0dc": "lilac",
"f95d73": "pink",
"f72224": "red",
"7c4b00": "brown",
"f98d33": "orange",
"fdebd5": "beige",
"d3c4a3": "light brown",
"af7836": "terracotta",
"898989": "gray",
"bcbcbc": "light gray",
"161616": "black"
}
The text _transparent will be displayed on buttons.
Filament sync with OrcaSlicer
For these settings to work, you need to disable the printer’s native screen using the DISPLAY_OFF macro.
The orca_lanes parameter publishes the IFS slots to the Moonraker database. OrcaSlicer reads filament color and type from there for the "Sync filament" button when the printer is added via Octo/Klipper (agent Moonraker) or via the FlashForge type.
True- publish slots (default)False- do not publish
If colors are managed by HelixScreen (helix = 1), publishing is skipped regardless of orca_lanes, so its data is not overwritten.
To disable, add to mod_data/user.cfg:
[zmod_color]
orca_lanes: False
Details
Slots are written to the lane_data namespace in the same format as AFC and Happy Hare: slot 1 → lane0, …, slot 4 → lane3, for example "lane0": {"lane": "0", "material": "PETG", "color": "#161616", "name": "PETG"}. All slots are published when Klipper starts, then only the changed slot on every color or type change. A slot with type ? is removed, filament presence from sensors is not taken into account. The external spool is not published.
AFC panel
The IFS slots (AD5X) and toolheads (Creator 5 Pro) are shown in Fluidd and Mainsail as a standard AFC panel. Works both with and without the native screen.
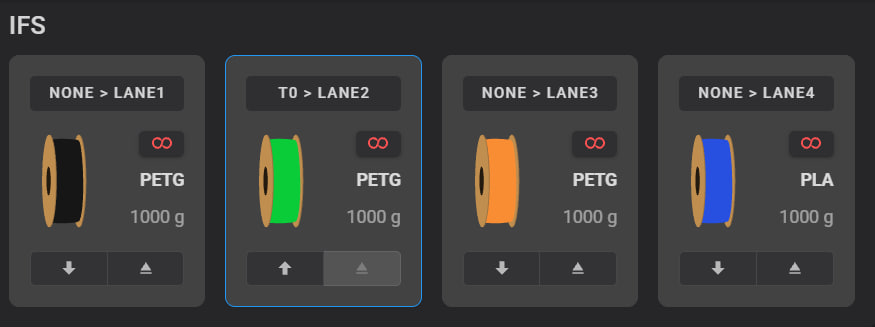
Enabling
SAVE_ZMOD_DATA AFC=1, then restart Klipper. To disable: SAVE_ZMOD_DATA AFC=0.
Features
- Color, type and filament presence in each slot.
- Change color and type, load and unload right from the panel.
- Lane selection window before printing in Fluidd (1.37.3+) and Mainsail: the mapping of file tools to slots is sent together with the print command, and the color selection window does not appear after it. The map is kept between prints and can be changed during a print as well.
- The AFC window has a "Bed mesh" toggle. It changes the global setting immediately, before you press "Print".
- Printing via the FlashForge protocol (OrcaSlicer, Flash Studio) uses the mapping from the slicer and starts right away, with the usual preparation (KAMP, MD5 check).
- Printing without a mapping (OrcaSlicer via Moonraker, GuppyScreen, KlipperScreen, macros) shows the color selection window or runs automatic matching, depending on the settings, just as without AFC.
- The infinite spool button reports that the replacement is picked by filament type and color.
zmod_afclite plugin
The zmod_afclite plugin has been removed and replaced by built-in AFC support. On update:
- if the plugin was enabled, it is disabled and AFC is enabled automatically;
- the plugin is removed from the Moonraker configs and its directory is deleted.
Acknowledgements
Thanks to DIEHARDave for the zmod_afclite plugin, which showed the way and the solution.
9. Fixing Trash Bin and Filament Cutting Knife Operation
Alternative version of the instructions
Different AD5X printers may have different coordinates for the trash bin and knife. Sometimes the difference can reach up to 4 mm.
Because of this:
- Filament may not reach the trash bin;
- Knife does not cut the filament;
- Printer head may hit the wall.
To fix this, you need to:
- Update Z-Mod.
- Open the file
/rw/Adventurer5M.json. - Find these lines:
{
        "CutXOffset" : 0.5,
        "CutYOffset" : -0.20000001788139343,
        "xOffset" : 0.0,
        "yOffset" : -0.20000001788139343,
        "zOffset" : 0.0,
        "zProbeOffset" : 0.004999995231628418
},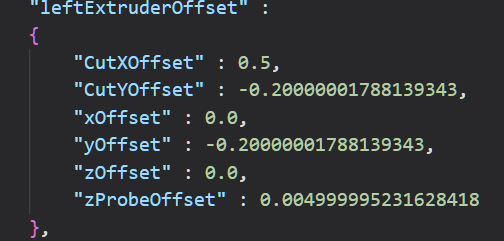
Replace only these values:
"CutXOffset": 0.0,
"CutYOffset": 0.0,
"xOffset": 0.0,
"yOffset": 0.0,
- Enter the command:
UPDATE_FF_OFFSET(this will update the settings). - Then enter:
_GOTO_TRASH(this will move to the trash bin).
Trash Bin Calibration
Alternative version of the instructions
- Enter the command
_GOTO_TRASH— the printer head will move to the trash bin. - If the bin doesn't close, carefully move the head until the bin closes. Use GCODE:
G1 Y230.2 - Check what Y coordinate you now have.
- Subtract 229 from this number. The result will be your
yOffset. - Check what X coordinate you now have.
- Subtract 52.5 from this number. The result will be your
xOffset.
Examples:
- If Y = 230.2, then
yOffset = 230.2 - 229 = 1.2 - If Y = 228.4, then
yOffset = 228.4 - 229 = -0.6 - Formula:
yOffset = Y - 229
Write this number to the file /rw/Adventurer5M.json. The bin is calibrated.
- Enter the command:
UPDATE_FF_OFFSET(this will update the settings). - Then enter:
_GOTO_TRASH(this will move to the trash bin).
Knife Calibration
Alternative version of the instructions
- Enter the command
_CUT_PRUTOK— the head will move to the knife. - Using the screen, move the head until the knife activates. Use GCODE:
G1 Y-7.7G1 X-1.7 - Check what X and Y coordinates you have.
-
For Y:
- Subtract your Y-coordinate from 7.5 by absolute value.
- Example: if Y = -7.7, then
CutYOffset = 7.5 - 7.7 = -0.2 - Example: if Y = -5.9, then
CutYOffset = 7.5 - 5.9 = 1.6 - Formula:
CutYOffset = 7.5 + Y
- Example: if Y = -7.7, then
- Subtract your Y-coordinate from 7.5 by absolute value.
-
For X:
- Subtract your X-coordinate from 2.5 by absolute value.
- Example: if X = -1.7, then
CutXOffset = 2.5 - 1.7 = 0.8 - Example: if X = -2.8, then
CutXOffset = 2.5 - 2.8 = -0.3 - Formula:
CutXOffset = 2.5 + X
- Example: if X = -1.7, then
- Subtract your X-coordinate from 2.5 by absolute value.
Write these numbers to the file /rw/Adventurer5M.json. The knife is calibrated.
- Enter the command:
UPDATE_FF_OFFSET(this will update the settings). - Then enter:
_GOTO_TRASH(this will move to the trash bin).
Restart the printer — everything is ready.
Setting up the basket on the AD5X stock firmware
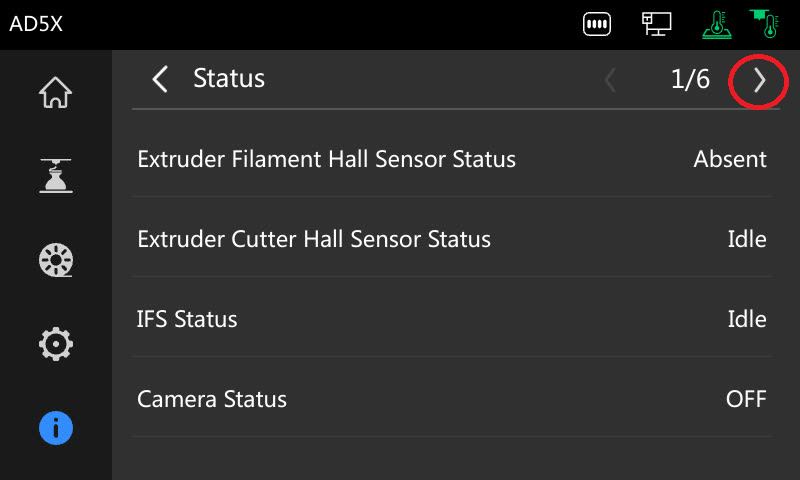
- Go to the "i" tab and press the
Statusbutton
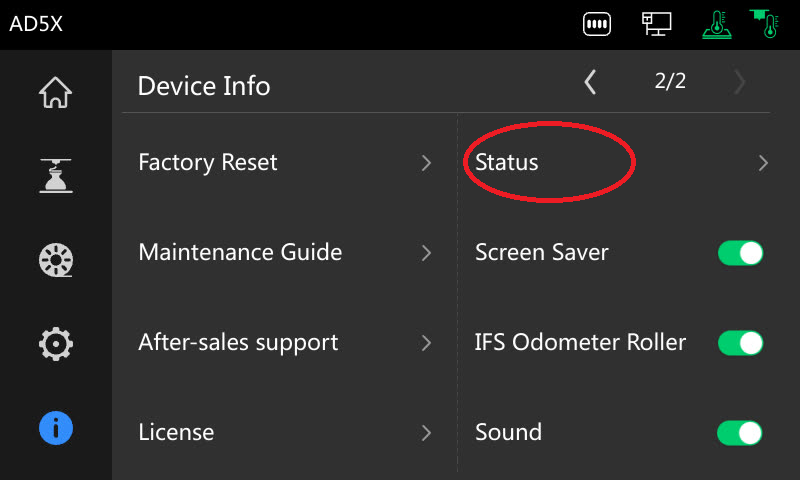
- Go to the 6th tab
-
Press and hold
Move the extruder to waste tray positionfor 20 seconds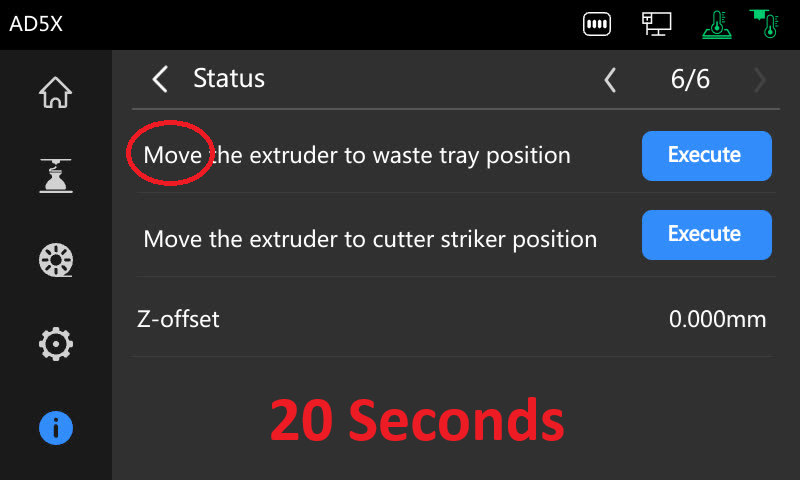
-
Adjust the head position in the waste tray so that it closes. Using the control arrows, park the print head at the receiver in such a way that the print head sufficiently presses the shutter lever, the nozzle is behind the moving shutter, and the shutter itself is flush with the front surface of the receiver.
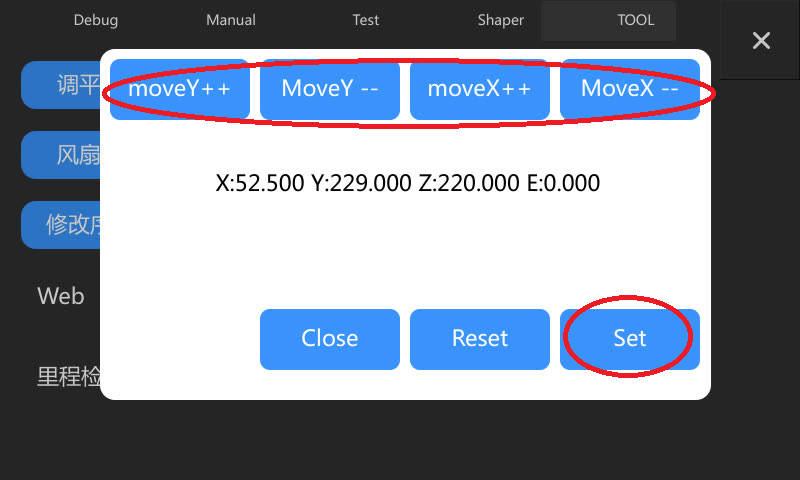
Press the Set button.
-
Press and hold
Move the extruder to cutter striker positionfor 20 seconds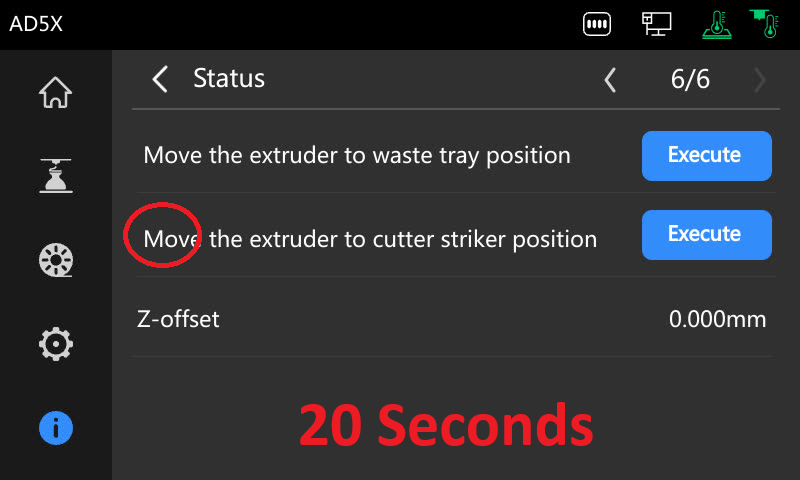
-
Adjust the cutter. Press
CutX— the cutter should cut the filament without slipping or striking.
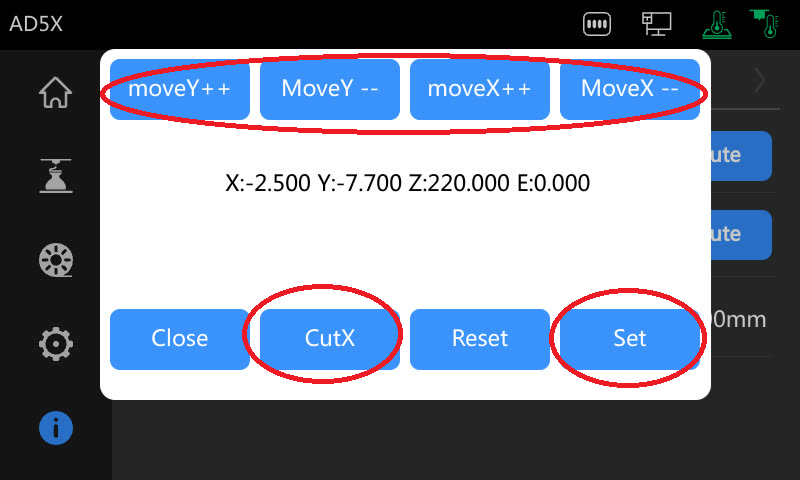
Press the Set button.
10. IFS commands
For these settings to work, you need to disable the printer's native display using the DISPLAY_OFF macro.
IFS_F10- Insert filamentIFS_F11- Remove filamentIFS_F13- IFS stateIFS_F15- Reset driverIFS_F18- Release filament in all channelsIFS_F23- Mark filament as insertedIFS_F24- Filament clampIFS_F39- Release filamentIFS_F112- Stop filament feedPURGE_PRUTOK_IFS- Purge filament from IFS to the extruderREMOVE_PRUTOK_IFS- Removes filament by filament numberINSERT_PRUTOK_IFS- Insert filament into IFS by filament numberSET_CURRENT_PRUTOK- Tell Klipper which filament is currently activeANALOG_PRUTOK- Load an equivalent filamentIFS_MOTION- Check if the filament has stopped or run out
IFS module parameters:
- debug - debugging (True, False)
- silk_count - on which attempt to consider the filament present in IFS (1)
- stall_count - on which attempt to consider the filament stopped (1)
- retry_count - number of times to retry the command on error (3)
- next_cmd_delay - duration to wait between processing IFS response and sending next command (0.2)
- send_ff_terminator - enables or disables 0.2s delay + 0xFF send after an IFS command; may be required by very old IFS firmwares (True, False)
- filament_NEWFILAMENT - Add a new filament type. Parameter - loading and unloading temperature for this material.
Set via mod_data/user.cfg:
[zmod_ifs]
debug: True
silk_count: 1
stall_count: 1
filament_NEWTYPE: 300
11. IFS Firmware Recovery
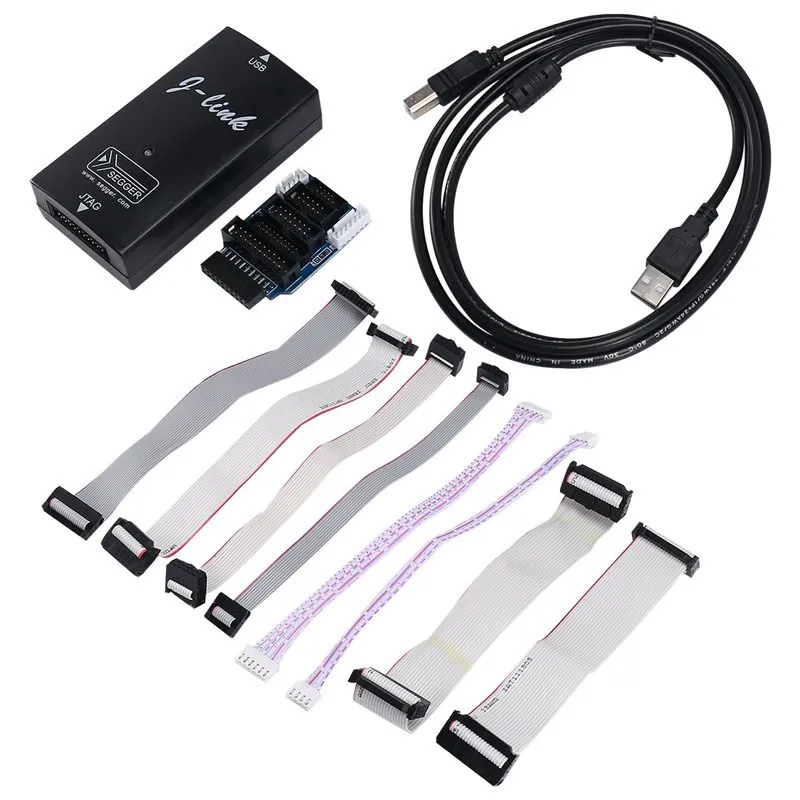
To recover the IFS firmware, you need an ARM J-LINK V9 programmer.
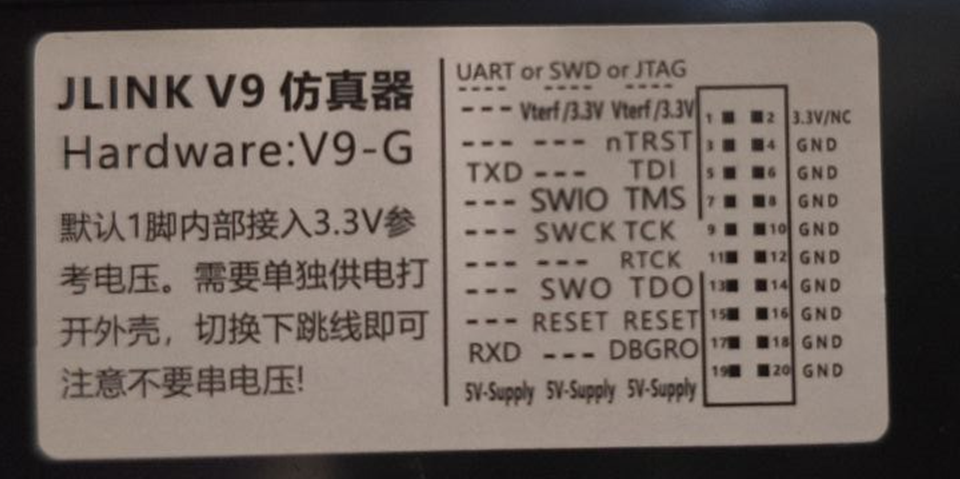
Solder wires to the IFS board.
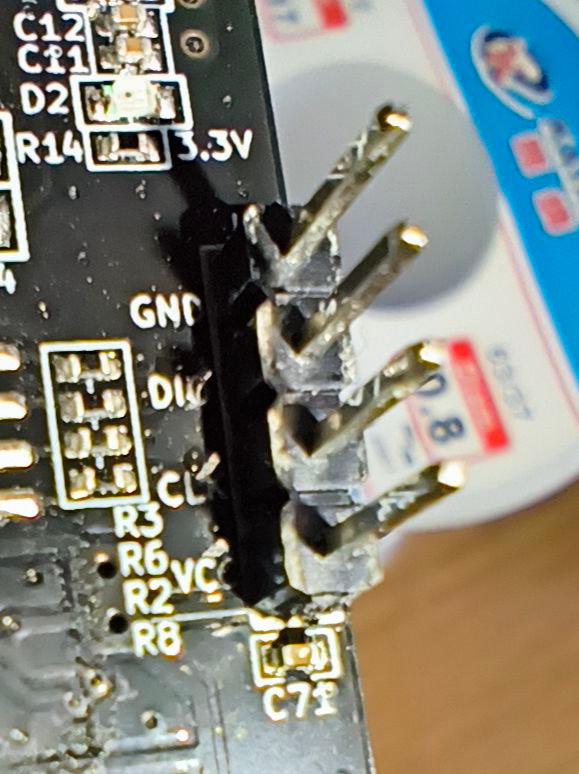
Connect:
- CLK to SWCK
- DIO to SWIO
- VCC to 3.3
- GND to GND
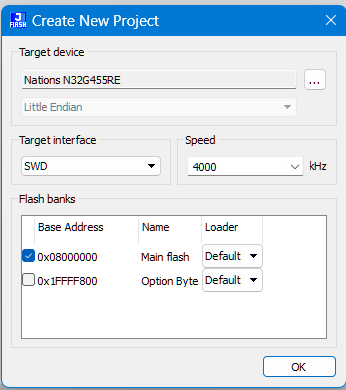
- Target Device -
Nations N32G455RE - Target interface:
SWD - Speed:
4000 - Check the first checkbox.
- Uncheck the second checkbox.
- Connect.
- Select the firmware file. Don't forget to extract it.
- Press F7 and wait for the device to be flashed.
IFS: sensor error: Serial communication error: read failed: device reports readiness to read but returned no data (device disconnected or multiple access on port?)
This error occurs when the native display and the mod access the IFS simultaneously.
It's best to reduce the native display lifetime to 10 seconds: SAVE_ZMOD_DATA DISPLAY_OFF_TIMEOUT=10